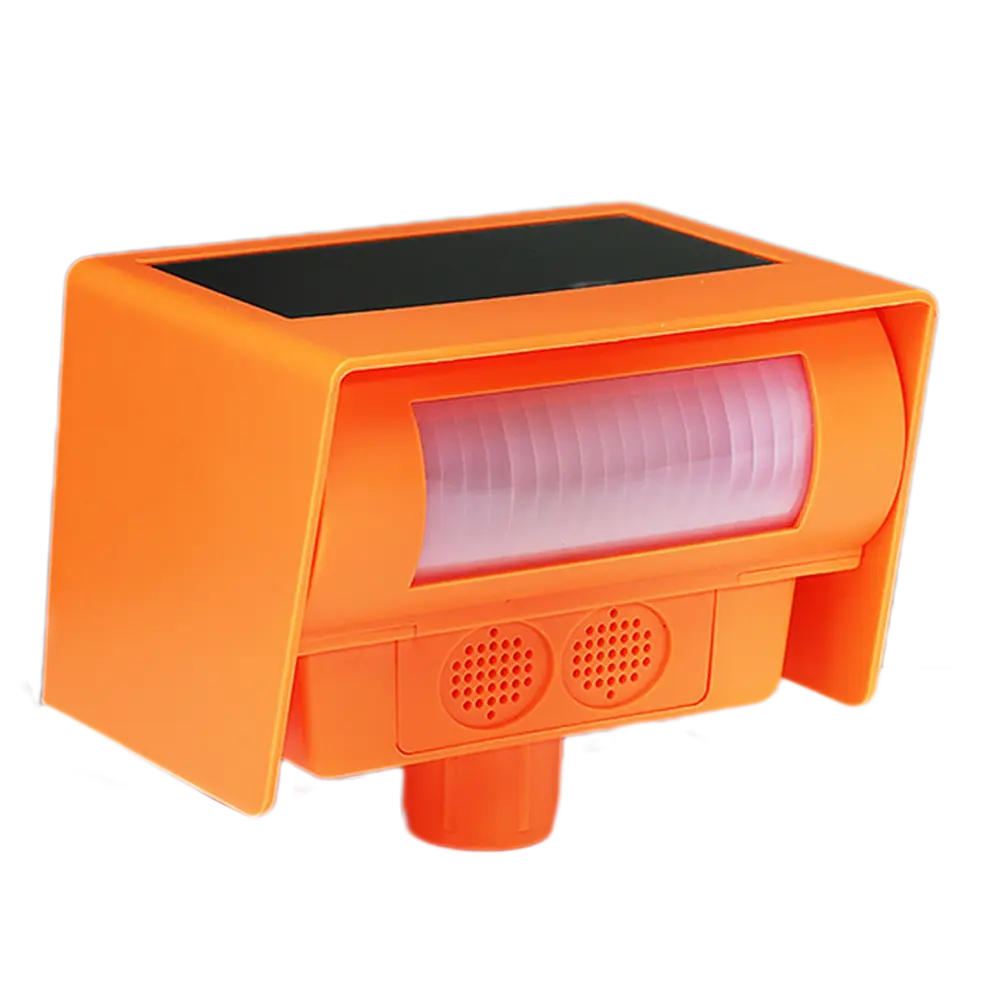
Is your patio or garden constantly invaded by stray cats, rodents, or birds? These uninvited guests can damage plants, leave messes, and disrupt your outdoor relaxation. Traditional solutions like chemical repellents or physical barriers often fall short—they’re either harmful to the environment, require constant upkeep, or simply don’t work. Enter the Friendly Solar Ultrasonic Animal Repeller by Dacaraca, a cutting-edge, humane solution designed to safeguard your outdoor space day and night.
In this guide, we’ll walk you through a simple 3-step installation process for this waterproof, solar-powered device, along with expert tips to maximize your patio’s protection.
Why Choose the Friendly Solar Ultrasonic Animal Repeller?
Before diving into installation, let’s explore why this device stands out:
- Humane & Eco-Friendly: Emits high-frequency ultrasonic waves (inaudible to humans) to deter animals without harm.
- Solar-Powered: Charges effortlessly under sunlight, eliminating wiring or battery costs.
- Weatherproof Design: Built to withstand rain, snow, and extreme temperatures.
- Versatile Protection: Effective against cats, mice, birds, raccoons, and more.
Perfect for gardens, patios, decks, and even rooftops, this device offers 24/7 protection with zero maintenance.
Step 1: Strategic Placement – Optimize Coverage
The key to success lies in positioning. The repeller’s ultrasonic waves cover a 20-30 ft radius, but obstructions like dense bushes or walls can limit effectiveness.
- Target Entry Points: Install near fences, trash bins, or garden beds where animals frequent.
- Height Matters: Mount the device 1-3 feet above ground to target ground-dwelling pests (e.g., mice) or higher (6-8 feet) for cats and birds.
- Avoid Obstacles: Ensure a clear “line of sight” for uninterrupted wave propagation.
Pro Tip: Use multiple units for large or irregularly shaped areas.
Step 2: Effortless Installation – No Tools Required
One of the device’s biggest perks? DIY-friendly setup in minutes:
- Activate Solar Panel: Place the repeller in direct sunlight for 4-6 hours to charge the built-in battery.
- Choose Mounting Style:
- Stake Mount: Push the included ground stake into soil or soft turf.
- Wall Mount: Use screws (included) to attach it to walls, fences, or posts.
- Angle the Sensor: Tilt the device slightly downward to focus waves on activity hotspots.
Note: The waterproof design (IP65 rating) ensures durability even during heavy rain.
Step 3: Test & Adjust Settings for Maximum Efficiency
Customize the repeller to match your needs:
- Mode Selection:
- Day/Night Mode: Automatically activates ultrasonic waves when motion is detected.
- 24/7 Mode: Continuous operation for high-traffic areas.
- Frequency Adjustment: Some animals may become habituated to a single frequency. Periodically toggle between the 3 adjustable frequencies to maintain effectiveness.
- Test Run: Sprinkle pet-safe bait (e.g., birdseed) to observe if pests are deterred.
Bonus Patio Protection Tips
Pair your ultrasonic repeller with these strategies for a pest-free zone:
- Remove Food Sources: Secure trash cans, clean up fallen fruits, and avoid leaving pet food outside.
- Natural Deterrents: Plant lavender or citrus herbs, which cats dislike.
- Motion-Activated Lights: Pair with solar lights to startle bold nighttime visitors.
Why This Device Beats Traditional Methods
- No Harmful Chemicals: Safe for kids, pets, and pollinators.
- Quiet Operation: Unlike noisy sonic repellents, this device operates silently (to human ears).
- Cost-Effective: A one-time investment with no recurring fees.
Transform Your Patio Today!
Don’t let stray animals ruin your outdoor sanctuary. With the Friendly Solar Ultrasonic Animal Repeller, you’ll enjoy a cleaner, quieter, and pest-free space year-round. Ready to reclaim your patio?
👉 Buy Now on Dacaraca.com and say goodbye to unwanted guests tonight!